Fashion and Technology
Our Focus
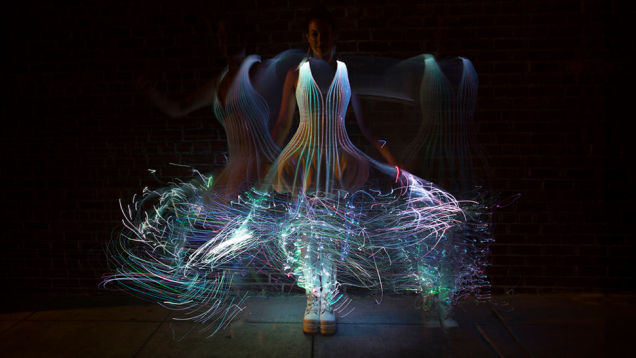
Do you like designing clothing, costumes, jewelry or accessories? Would you like to explore creating fashion with high tech elements? In this class we will connect fiber arts like sewing with microcontrollers, LEDs, programmable circuits and 3d printed and laser cut elements to make marvelous wearables.

MoodBoards for Inspiration
What is a mood board? A mood board is typically a combination of images, fonts, colors, and textures that define the style of the project or the designer. It is a tool for sharing and planning fashion projects that fit an individuals design interests.
The slide show on the right gives examples of some mood boards.
Using Paint, create a moodboard which expresses your interest in fashion. You will be using copy and paste extensively to add things to your board.
Search Google images for things that express your fashion interests/aspirations or just your design style. Include words, patterns, clothing items, images that appeal to you-- anything. Your moodboard may turn out to be very cohesive or it may be quite eclectic. Either is fine!

Tooling Up
Our first step in this class will be learning the abilities and constraints of the various tools we have at our disposal. We will be working through:
Hand sewing
Hand sewing with conductive thread
Handsewing circuits
As we move through the course, we will be learn to add embellishments with the tools:
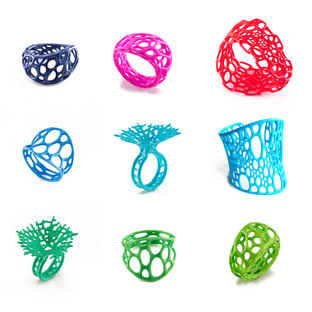
3d printing jewelry/clothing components
Laser cutting jewelry/clothing components
As final projects, students will choose between various options using the affordances of the Innovation Lab.You will have many options, including:
Designing a line of accessories
Upcycling clothing/accessories
Programming Lilypads to create interactive wearables
Machine sewing clothing/accessories
Embellishing knit or crochet pieces
Hand Sewing 101
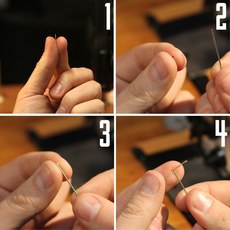
How to thread a needle:
Hold the thread between your thumb and index fingers.
Pinch down on the thread between your fingers until you can barely see the tip of the thread between your fingertips. With your other hand holding the needle, bring the thread and needle eye together.
Instead of trying to push the tip of the thread through the eye of the needle, push the eye of the needle onto the tip of the thread. Your fingertips give the thread support so it will not deflect or fray.
With a little practice you should be able to feel with your fingers when the needle is being threaded properly. Keeping your fingers pinched together to support the thread, follow through and push the needle between your fingertips. As you part your fingertips you should reveal a threaded needle.
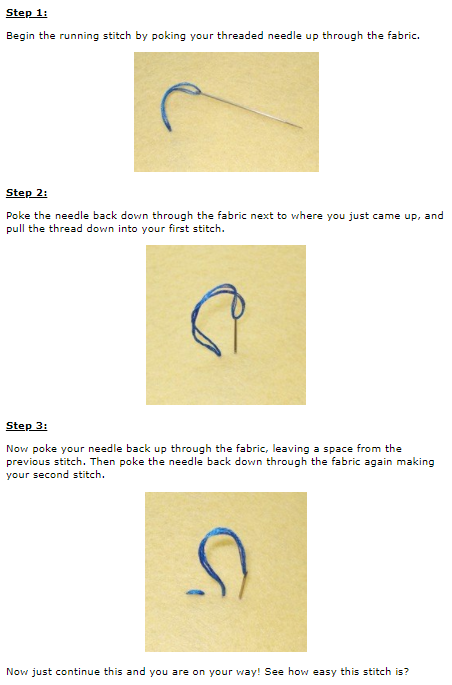
Running Stitch:

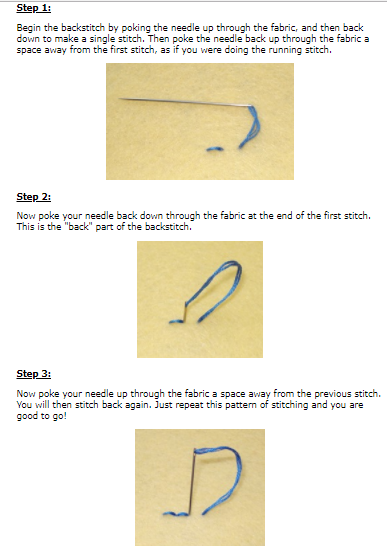
Backstitch:
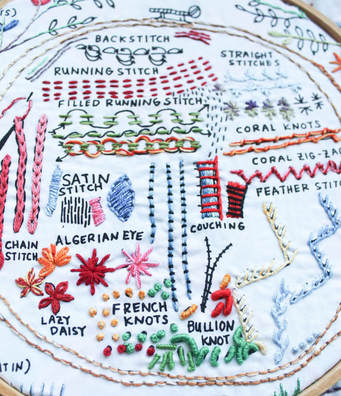
her embroidery stitches that you can use:
Embroidery Stitch Guide
Helpful Stitch Instructions
More Advanced Techniques
Sewing Project Ideas
Embroider an accessory you own:
hats
sneakers (canvas)
shirts
jackets
jeans
gloves
tie
suspenders
Make a new accessory:
bracelet
scarf
bag
patch
Embroider a notebook.
Make a sampler.
Make a bookmark.
Embroider a logo for a sports team or company you like.
Embroider a doodle.
Jewelry Basics
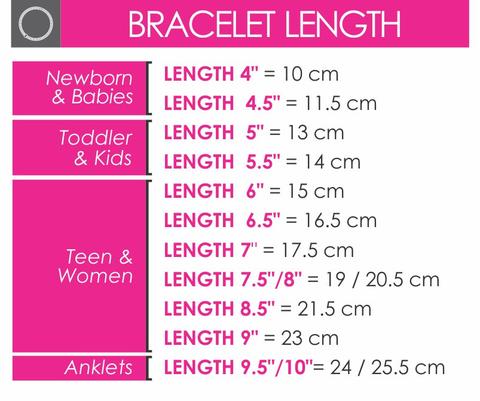
Making Necklaces, Bracelets or Anklets
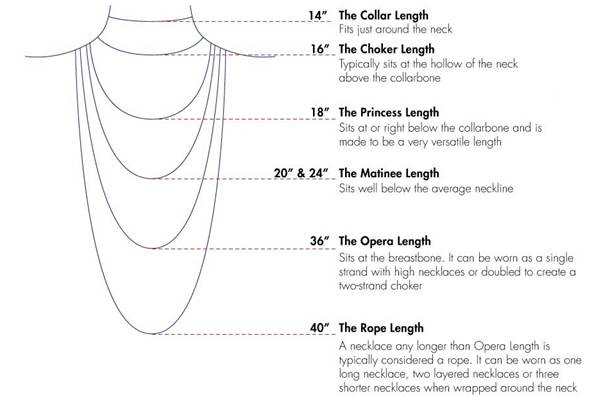
For chains:
Determine length of chain needed. Either measure yourself or use the standard lengths in the images.
Use wire cutters to cut to the correct length.
Use jump rings to attach clasp.
Use jump ring to suspend pendant.
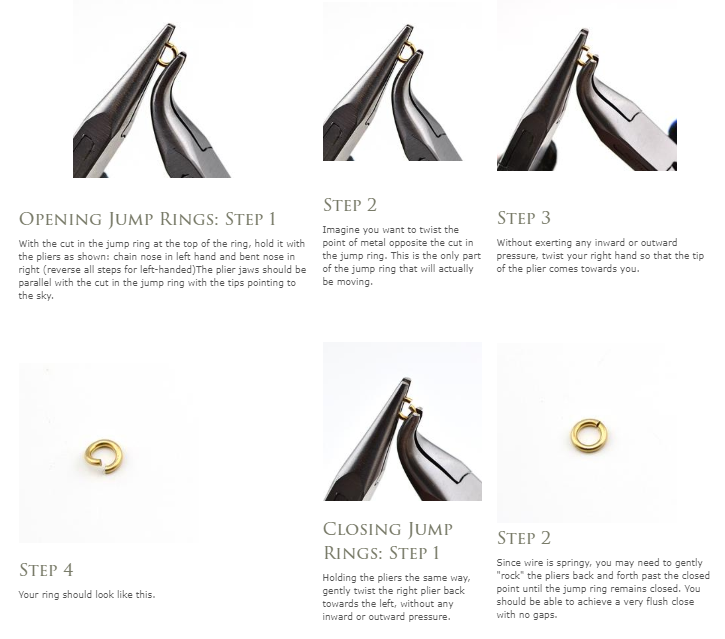
How to Open and Close Jump Rings
You can use two needle nose pliers to do this as well.
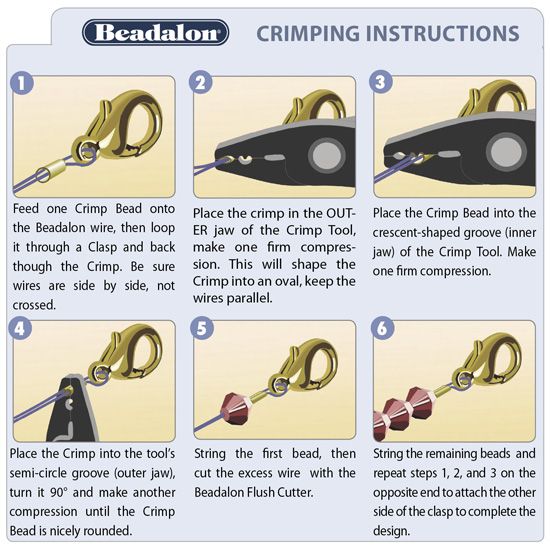
Basic Beading Instructions
Cut tigertail or other threading material to about 3 inches longer than needed.
Connect clasp to one end using crimp bead.
String beads.
Connect other end of clasp or jump ring to the other end using crimp bead.